Assisted Setup for Power BI in Business Central: Part 1: Preparing Data Set
Introduction
Business Central data can be retrieved using Power BI, allowing you to create dashboards and reports. When compared to the rigidity of Business Central reports, Power BI's customizable display, data merging, and drill-down capabilities make it an attractive alternative. There are some Power BI reports that can be viewed directly within Business Central, without the need to switch to a different application.
If you're a Business Central user or partner, you've probably seen the Power BI Reports in the Role Center.
In this post, we will see how to prepare business central data for Power BI using assisted setup (Web services)

Important points to note
- You need a Power BI license
- You should have a Power BI account and should have logged in with the account
Let's get started
Step 1: Download and Install Power BI
Power BI Desktop must be installed before you can generate Power BI reports. Access your data graphically using the Power BI Desktop's drag-and-drop canvas, a variety of cutting-edge data visualizations, and a streamlined report-creation process.
Power BI Desktop is available for web-based or app download through the Microsoft Store.
Windows Store App
Download from the Windows Store
A significant benefit is it automatically stays updated if you use this method.
Download Power BI Desktop from the web
Download from the web
If you use this option, you must manually update Power BI Desktop periodically.
Step 2: Sign in with the mail id which you will use in the business central
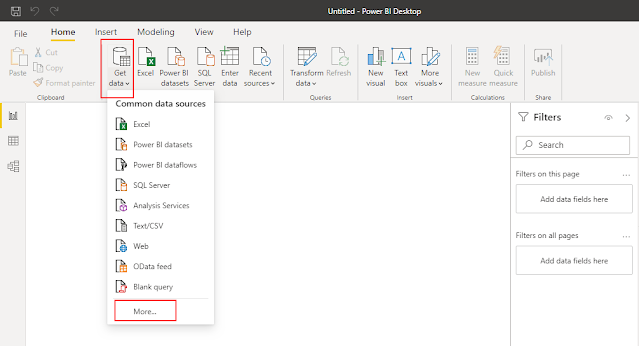
Step 3: Choose Get data -> More
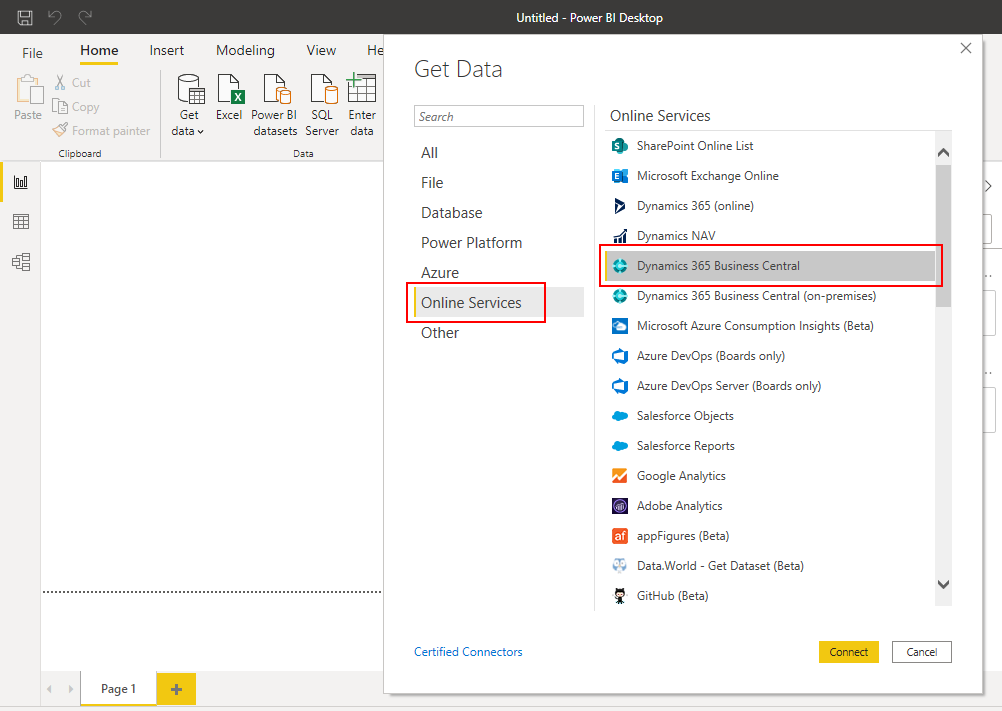
Step 4: Choose Online Services -> Dynamics 365 Business Central, then click Connect.
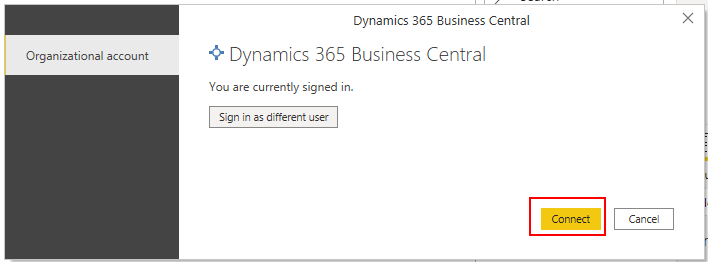
Step 5: Sign in to Business Central.
Step 7: You can find that you can choose the environments of Business Central.

Step 8: Make the dataset available to Power BI, we need to prepare the data set either through web services or through API.
We can use API to add datasets in the following ways:
- Query Objects
- Page Objects
- API Query objects
- API Page objects
The Reporting Data Setup wizard found in Assisted Setup can be used to add datasets as well.
Step 9: Create queries using the assisted setup
You can use the aided setup tutorials in Business Central to build up the platform for specific use cases and integrate additional capabilities. One such is the instruction to "Set up reporting data for your reports".
The report data sets generated by this tutorial can be imported into Excel, Power BI, or any other reporting application that supports OData.
These are the methods to access the Assisted Setup page.
Using the Tell Me function, pick the search for page icon, type "Assisted Setup," and then click the relevant link.
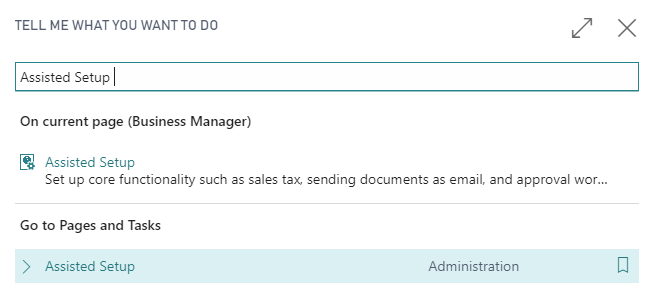
The Assisted Setup page opens.
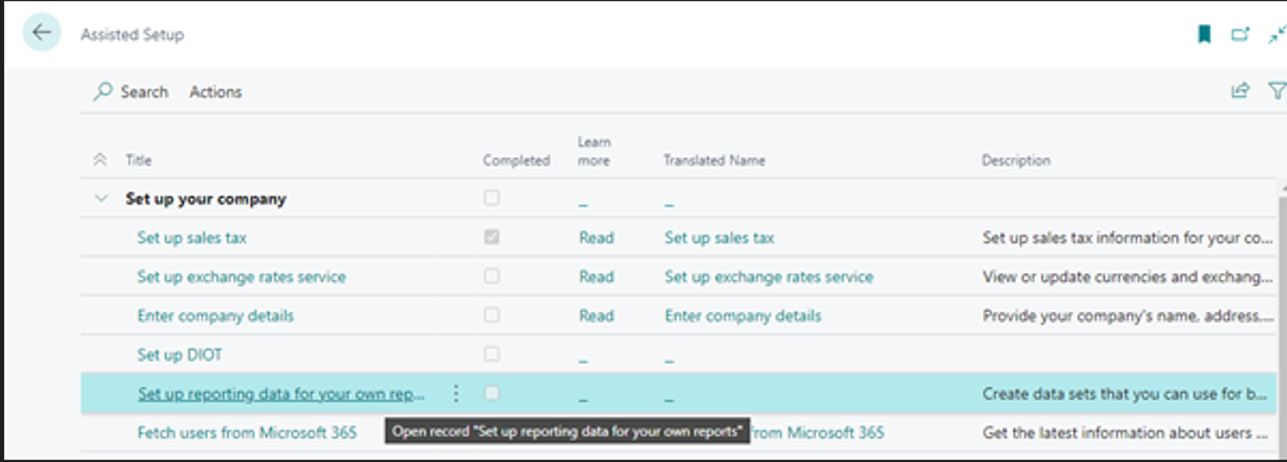
By choosing it on the Assisted Setup page, you may access the Setup Reporting Data wizard page.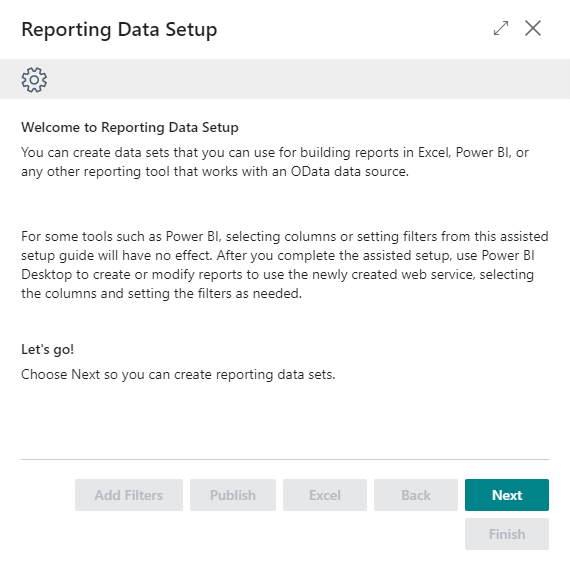
To go on to the following page, click Next.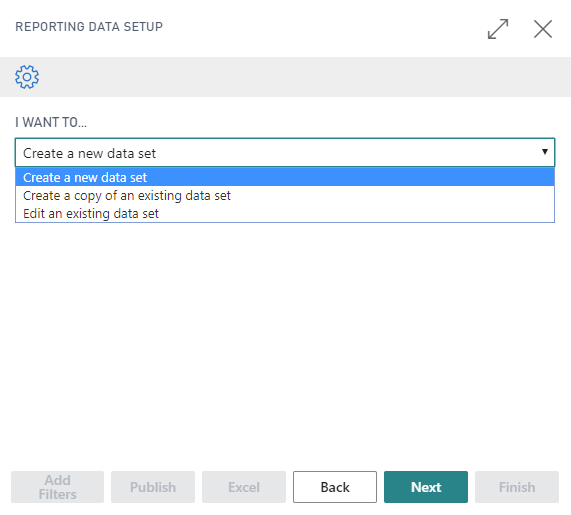
Here you can see that the Setup Reporting Data wizard allows you to perform three tasks:
- Create a new data set
- Copy an existing data set to create a new one.
- Edit an existing data set
Follow these procedures to generate a new data set:
On the second page of the Setup Reporting Data wizard, select the option Create a new data set and click Next.
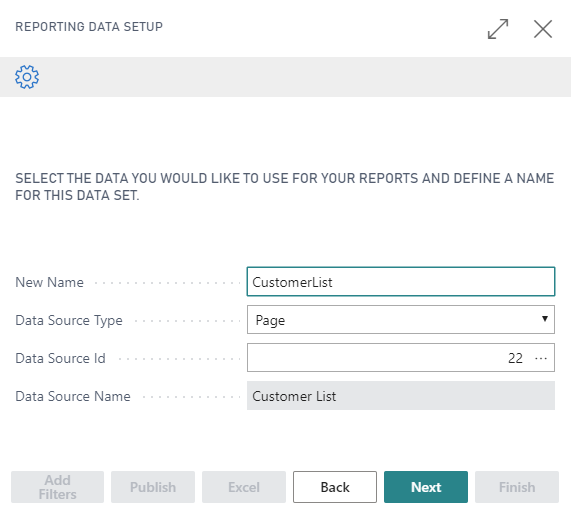
The Reporting Data Setup page opens.

On this page, you need to provide the following information:
- New Name - Specifies the service name. Name can't contain space(s).
- Data Source Type - Page or Query
- Data Source Id - The ID of the Page or Query
- Data Source Name - The Name of the Page or Query selected in the Data Source Id field.
As an example, you can use the customer list page as a data source, so then the page would look as follows:
Click Next to move to the field and filter selection page.

In this screen, you can select the field from the source page or query that you want to include in the dataset. Make sure you only select the fields that are required for your report.
When you are done adding filters, click OK, and then click Publish to publish the new query as a web service.

As an alternative, you can also use the Excel button. If you use the Excel button, it downloads an Excel file and when you open it, it's populated with the data you selected.

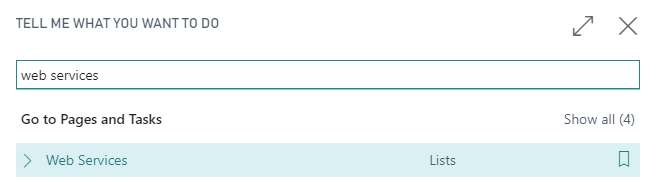
Now select the Finish button. The wizard closes and the page is added in the web services list. To open the web services, select the Search for page icon that opens the Tell Me feature, enter web services, and then choose the related link.
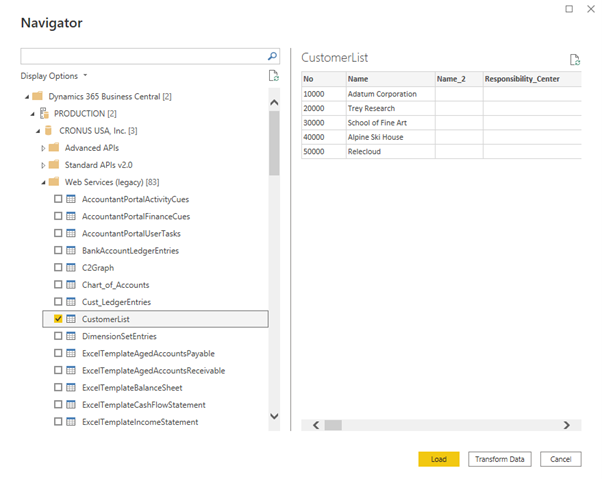
The Web Services page opens, and you can see your entry in the list.

You've now created a new data set and made it available as a web service.
You have learned how to make new data sets, modify existing ones, and make copies of existing ones by using the Reporting Data Setup wizard in the Assisted Setup. So, eventually, the data sets are exposed as web services on the Web Services page. These datasets are viewable in Power BI Desktop. The following is what you should see after launching Power BI Desktop and establishing a connection to Business Central, as covered in the last lesson.
As a result, Power BI Desktop can now import and make use of these data sets. To be clear, the Reporting Data Setup process is designed for the production of relatively simple data sets that don't require too many fields. Data sets should only contain fields that will be used in the final report. If you don't intend to use the extra fields in your Power BI report, there's no point in adding them.
The Reporting Data Setup procedure saves time by allowing you to create, modify, and duplicate data sets directly in the Business Central client, rather than in the development environment. When creating Power BI reports, however, you'll typically need to use the development environment to generate data sets that include information from many tables and fields that may not be accessible through the prebuilt pages and queries.
To better suit the report's needs, it is advised that new data sets be created for Power BI rather than recycling old ones (with their associated pages and queries).
Thank you, will see you in the next article


Thank you for sharing such a valuable topic.
ReplyDeleteImprove your business productivity with Power BI Consultant and get what you need from your data in the most efficient way possible.
Glad you found it valuable.
DeleteThank you for sharing such a valuable topic. Improve your business productivity with Power BI Consultant and get what you need from your data in the most efficient way possible.
ReplyDelete